Hello!!
Weird things happen. I got up last week with pain in my jaw. Went to the doctor and I seem to have dislocated it in my sleep somehow. So have been on painkillers and sleeping for 12-14 hours a day. AND that would explain me not updating my work log.
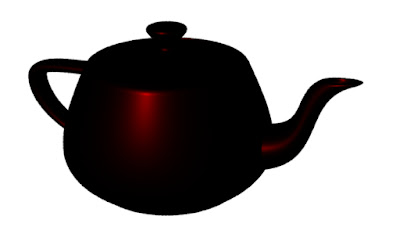
However, the constant shader is not very useful as it doesn't give us any clue about the 3D shape of the object being rendered. So then I moved on to development of a Diffuse shader. This shader takes into account the diffuse reflections and calculated the amount of light being reflected based on the normals of the surface.
Ci = Cs * diffuse(Nf) * Oi
The shader has been applied to a sphere and a teapot.
This shader, is very close to the renderMan Matte shader except for that it doesn't take into account the ambient reflections. We can simply add the ambient reflections by modifying the Ci in this way:
Ci = Oi * Cs * (Ka * ambient() + Kd * diffuse(Nf))
As we can now compare, the objects react better to the ambient light in the scene.
I also went on to develop a metal and a plastic shader based on the metal and plastic materials that are built in renderMan. Here is the output for that:
Once I was done with developing all the basic shaders I started developing some textures. Here I have developed a vertical ramp, horizontal ramp in black and white and then I added some colour into it and the ramp interpolates automatically form black to purple. The output for the operation is here:
Weird things happen. I got up last week with pain in my jaw. Went to the doctor and I seem to have dislocated it in my sleep somehow. So have been on painkillers and sleeping for 12-14 hours a day. AND that would explain me not updating my work log.
Now I am slowly trying to get to work whenever I get out of my drug induced sleep :p
I have started with starting shader development. Have been reading a bit of RSL and experimenting with very basic shaders. Still VERY groggy..
I have started with starting shader development. Have been reading a bit of RSL and experimenting with very basic shaders. Still VERY groggy..
 |
| Utah Teapot with hsv ramp shader |
Here I developed a shader that gives a ramp based on hsv values and applied it to the Utah teapot. Ofcourse I don't yet know how to get the projections right, so everything is a bit messed up. The shader can be seen on a plane in the image below.
 |
| hsv ramp shader applied on a plane |
And here I have applied it on a sphere. It can be seen that the shading is a regular plastic variety and as a texture we have a hsv ramp. I used
Ct = color "hsv" (s,t,1);
to get this effect.
 The shader applied to a sphere with plastic shader The shader applied to a sphere with plastic shader |
I started with developing simpler shaders and understanding how the renderMan shaders are actually written. So I built up the renderMan constant shader and applied it to a sphere and a teapot. Nothing special going on here, we just premultiply the opacity with the input colour and assign the value obtaied to Ci:
Ci = Oi * Cs
However, the constant shader is not very useful as it doesn't give us any clue about the 3D shape of the object being rendered. So then I moved on to development of a Diffuse shader. This shader takes into account the diffuse reflections and calculated the amount of light being reflected based on the normals of the surface.
Ci = Cs * diffuse(Nf) * Oi
The shader has been applied to a sphere and a teapot.
This shader, is very close to the renderMan Matte shader except for that it doesn't take into account the ambient reflections. We can simply add the ambient reflections by modifying the Ci in this way:
Ci = Oi * Cs * (Ka * ambient() + Kd * diffuse(Nf))
As we can now compare, the objects react better to the ambient light in the scene.
I also went on to develop a metal and a plastic shader based on the metal and plastic materials that are built in renderMan. Here is the output for that:
Once I was done with developing all the basic shaders I started developing some textures. Here I have developed a vertical ramp, horizontal ramp in black and white and then I added some colour into it and the ramp interpolates automatically form black to purple. The output for the operation is here:
 |
| A horizontal ramp |
 |
| A vertical ramp |
 |
| A horizontal coloured ramp |


