So, I have been working on this BrickMaker tool in Houdini for a couple of days now and I would say that it is done(at least I am leaving it here). I am not taking it any further as this is just a part of my learning process and I need to move on. We would be using it in our project titled "EGO" for destruction simulations.
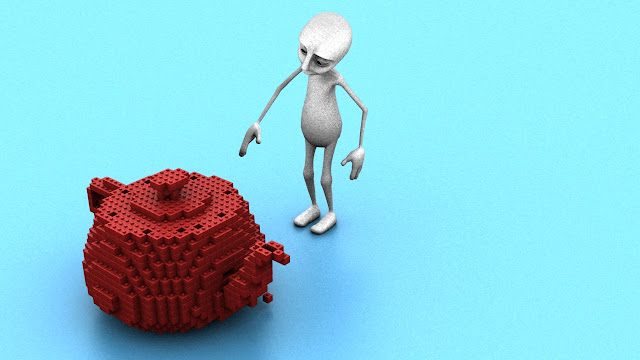
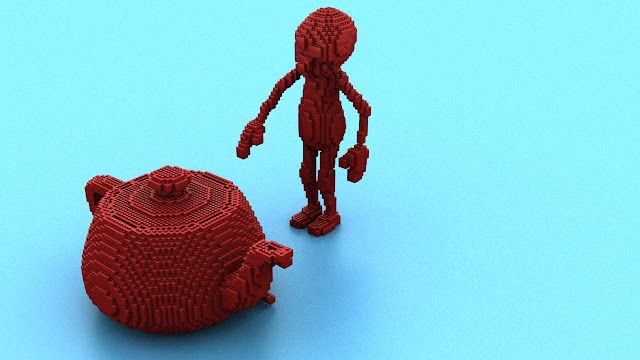
Here are some results form the tool. These have been rendered out using Mantra, using a simple Mantra shader with a default environment light.
The tool can take any input geometry and convert it into bricks(or Lego blocks) The instancing bits can be changed to look like anything, Lego, plain blocks, matchsticks etc. In the images below you can see how the tool can be applied to any geometry.
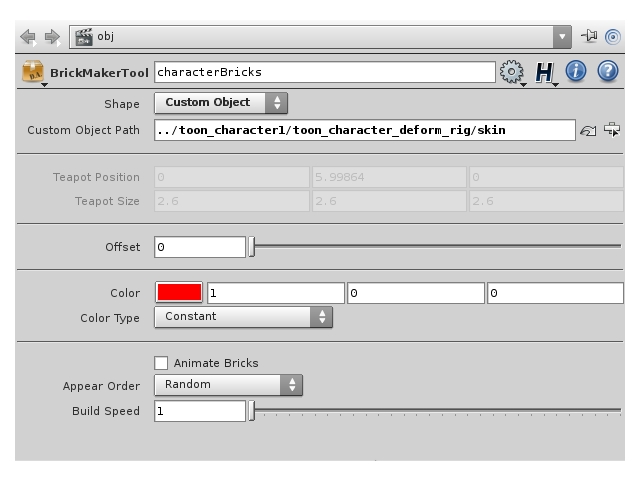
You have several options. You can have the default teapot, or you can source your own geometry using the Custom Object Path. If you are using the default teapot, you can control it's size and position from within this parameter box. Offset allows you to increase/decrease the number of units the geometry is constructed with. We also have some access to the shader, so you can chose to have various types of colours. There is also an option to Animate the bricks which makes the geometry appear slowly. Appear order lets you decide, how you want the blocks to appear. And with build speed you can control the speed with which the blocks are placed to construct the geometry.
Right now I am doing some tests on it. I am currently rendering out some animations that I made using this tool. They should be up by today evening or tomorrow morning.
Cheers! Thanks for reading!
Here are some results form the tool. These have been rendered out using Mantra, using a simple Mantra shader with a default environment light.
The tool can take any input geometry and convert it into bricks(or Lego blocks) The instancing bits can be changed to look like anything, Lego, plain blocks, matchsticks etc. In the images below you can see how the tool can be applied to any geometry.
 | |
| Hmm... A Lego teapot! |
 | ||||||
| OH MY GOD!! I am Lego too!! |
Here is the little user-interface for the tool
 |
| Custom UI |
You have several options. You can have the default teapot, or you can source your own geometry using the Custom Object Path. If you are using the default teapot, you can control it's size and position from within this parameter box. Offset allows you to increase/decrease the number of units the geometry is constructed with. We also have some access to the shader, so you can chose to have various types of colours. There is also an option to Animate the bricks which makes the geometry appear slowly. Appear order lets you decide, how you want the blocks to appear. And with build speed you can control the speed with which the blocks are placed to construct the geometry.
Right now I am doing some tests on it. I am currently rendering out some animations that I made using this tool. They should be up by today evening or tomorrow morning.
Cheers! Thanks for reading!


